

If you’re a gardening enthusiast, then you know how important it is to give your beloved plants the right support they need to flourish. To ensure your climbing plants grow in the right direction, this guide will teach you how to make a homemade trellis for your garden. From design and materials to step-by-step instructions, building a DIY trellis will not only add beauty to your garden but also provide the necessary support your plants need to thrive.
With this guide, you’ll be able to follow the instructions easily, even if you’re not a professional carpenter. In no time, your garden will showcase a beautiful and sturdy trellis that you can be proud of.
A rustic wooden trellis made of interwoven branches and twigs, adorned with lush vines and blooming flowers crawling up its sides. The trellis stands tall against a backdrop of verdant trees and a bright blue sky. Sunlight filters through the leaves, casting dappled shadows on the ground below. In the foreground, a pair of gardening gloves and a trowel lie nearby, recalling the care and effort that went into crafting this beautiful DIY trellis.
Key Takeaways:
- Building a homemade trellis provides the necessary support for climbing plants.
- You can make a beautiful and sturdy trellis with minimal carpentry skills.
- You’ll learn how to make a trellis using different designs and materials.
- Choosing the right location and maintaining the trellis is crucial for its longevity.
- Following the step-by-step instructions provided in this guide will help you build a trellis quickly and easily.
The Benefits of Having a DIY Trellis in Your Garden
If you’re looking for an easy way to enhance the beauty and productivity of your garden, a DIY trellis is the perfect solution. By incorporating a homemade trellis in your garden, you can enjoy numerous benefits that will elevate your gardening experience.
Maximizing Space
A trellis allows you to grow climbing plants vertically, saving you valuable garden space while still providing ample room for your plants to thrive. With a trellis, you can grow more plants in a smaller area, making the most of your available space.
Improving Plant Health
By providing support and structure for your climbing plants, a trellis encourages healthy growth and improves air circulation. This also helps to prevent disease and damage caused by pests or harsh weather conditions.
Adding Visual Interest
A trellis adds a unique and attractive feature to your garden, creating a focal point and enhancing the overall aesthetic appeal. Whether you prefer a simple or intricate design, a trellis can complement any garden style or theme.
Creating Privacy
A trellis can also serve as a natural privacy screen, offering a sense of seclusion and intimacy to your garden oasis. You can even plant vines or climbing flowers to create a lush and beautiful barrier.
Increasing Yield
Using a trellis can increase the yield of your garden because it ensures optimal conditions for your plants to grow and thrive. It’s a great way to grow more produce than you would usually be able to in a small space.
Whether you have limited space or want to add an eye-catching feature to your garden, a DIY trellis is an affordable and practical solution that offers numerous benefits. Get creative and start building your homemade trellis today to enjoy a beautiful, productive, and thriving garden all year round!
Essential Tools and Materials Needed for Building a Trellis
Building a trellis requires several essential tools and materials. Below is a list of items that you will need to ensure a successful DIY project:
| Tools | Materials |
|---|---|
| Measuring tape, Saw, Drill, Screwdriver, Level Staple gun Twine/, cord Gloves, Safety glasses | Wooden stakes or poles Wooden slats or lattice Galvanized screws or nails Wire or fishing line Plant ties or clips Concrete or gravel (optional) |
It’s important to make sure you have all the necessary tools and materials before beginning your project. This will save you time and prevent frustration down the road.
Note: The amount of materials needed will depend on the size of your trellis and any additional features you choose to include.
A pile of wooden stakes and poles leaning against a brick wall, with a coil of sturdy wire mesh fencing nearby. There are also several bags of potting soil and a stack of gardening gloves on the ground next to them. The scene is bathed in soft, warm sunlight.
Planning and Design: Creating a Blueprint for Your Trellis
A homemade trellis is a great addition to any garden. Not only does it provide support for your climbing plants, but it can also add aesthetic appeal to your outdoor space. Before you start building your trellis, it’s important to plan and design it properly to ensure it meets your needs and complements your garden. Here are some tips on designing a homemade trellis:
Determine the Size, Shape, and Style
The first step in designing your homemade trellis is to determine its size, shape, and style. Consider factors such as the size of your garden, the height of your plants, and the style of your outdoor space. A trellis that is too large or too small could look out of place, so it’s important to get the dimensions right.
You should also consider the style of your trellis. Do you want a simple, minimalist design, or something more decorative? Think about the materials you’ll be using to build the trellis and how they’ll complement your existing outdoor decor.
Choose the Right Materials
When it comes to building a homemade trellis, there are many materials to choose from. Popular options include wood, bamboo, and metal. Each material has its own advantages and disadvantages, so it’s important to choose one that suits your needs and budget.
Regardless of which material you choose, make sure it is sturdy enough to support the weight of your climbing plants. You may also want to consider treating the material with a sealant or weatherproofing agent to ensure it lasts for many years to come.
Consider the Plant’s Needs
When designing your homemade trellis, it’s important to consider the needs of the climbing plants it will support. Some plants need a lot of space for growth, while others can thrive in more confined areas. Additionally, some plants may require specific types of support, such as a mesh or netting structure.
Take the time to research the plants you’ll be growing and their requirements to ensure that your trellis provides the necessary support.
Draw a Blueprint
Once you’ve determined the size, shape, style, materials, and plant requirements of your homemade trellis, it’s time to draw a blueprint. This will serve as a guide during the construction process and ensure that you end up with a trellis that meets your needs.
Include all the necessary measurements and details in your blueprint, such as the height, width, and spacing of the support beams and crossbars. You may also want to include a list of materials and tools needed to build the trellis.
Remember, a well-designed homemade trellis can enhance the beauty and functionality of your garden, so take the time to plan and design it properly.https://www.youtube.com/embed/-jhL0J02pbs
Choosing the Right Location for Your Trellis
Now that you’ve designed and planned your homemade trellis, it’s time to find the perfect spot to put it in your garden. Choosing the right location is essential to ensure your trellis is effective in supporting your climbing plants.
Consider factors such as:
- Sunlight: Make sure your trellis is placed in a spot that receives adequate sunlight. Most climbing plants need at least six hours of direct sunlight daily to thrive. Observe your garden throughout the day to identify the sunniest spots.
- Plant requirements: Different plants have specific needs for growing. Some require more shade than others, while some prefer to climb in a certain pattern. Make sure the location of your trellis aligns with the needs of your climbing plants.
- Structural support: A sturdy trellis requires a solid support system. If you plan to install your trellis against an existing structure, such as a wall or fence, make sure it can support the weight of the trellis and the climbing plants it will hold.
Once you’ve identified potential spots, visualize the placement of your trellis by holding up the design against the location. The shape of the trellis should complement the shape of the surrounding plants and landscape.
An aerial view of a backyard with a garden plot. The plot is surrounded by tall trees and bushes, providing shade and protection for plants. In the center of the plot, there is an empty space, indicating the perfect location for a trellis. The grass around the plot looks well-manicured and healthy, implying that the garden is well-cared for.
The perfect location for your trellis will vary depending on your goals and garden layout, but careful consideration and planning will ensure successful plant growth and a beautiful garden design.
Different Types of Trellis Designs and Their Uses
When it comes to trellis designs, the options are endless. Choosing the right one for your garden can seem overwhelming, but with our guide, you’ll be able to make an informed decision. Below, we’ve outlined some of the most popular trellis designs and their uses.
The Classic Grid Trellis
The classic grid trellis is the most popular design and serves as a great starting point for first-time builders. It’s a simple, square or rectangular frame with evenly spaced horizontal and vertical bars. This design is suitable for most climbing plants, including beans, cucumbers, and morning glories.
The Obelisk Trellis
The obelisk trellis features a pyramid or cone-shaped frame, typically made of wood or metal. This design is perfect for adding height to your garden and creating a focal point. It’s particularly popular for growing climbing roses or tomatoes.
The Fan Trellis
The fan trellis is ideal for creating an eye-catching display in your garden. It features a set of diagonal bars arranged in a fan shape, resembling a half-opened hand-held fan. This trellis is best suited for vines and climbing plants that require a lot of support.
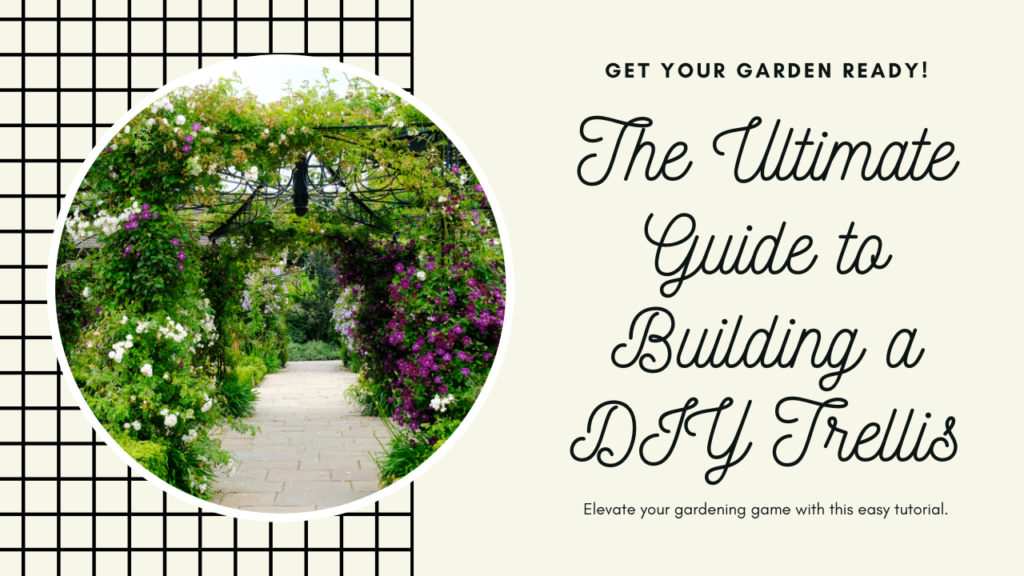
The Arch Trellis
The arch trellis is a beautiful addition to any garden, creating a stunning entrance or focal point. This design features a gracefully curved arch with a lattice-style framework, making it perfect for growing climbing roses, clematis, and other flowering plants.
The Ladder Trellis
The ladder trellis consists of a series of horizontal bars attached to vertical bars, resembling a small ladder. This design is excellent for training climbing plants with small tendrils, such as peas, beans, and ivy.
Remember, when choosing a trellis design, always consider the plant’s specific needs, space, and sunlight requirements. With the right design, your trellis can become a colorful, thriving focal point in your garden.
Building the Frame: Step-by-Step Instructions for a Sturdy Trellis
Building a trellis frame is a crucial step in the construction process. Follow these detailed step-by-step instructions to create a sturdy frame that can withstand the weight of your climbing plants.
- Measure and cut the main frame components: Using a circular saw or handsaw, cut four lengths of 2×2 lumber to your desired trellis height. Then, cut two shorter lengths of 2×2 lumber to create the top and bottom horizontal pieces for the frame. Make sure all pieces are cut to precise measurements for a level and balanced frame.
- Assemble the frame: Lay out the four vertical pieces on the ground, and position the top and bottom horizontal pieces between them. Use clamps to hold the pieces in place, or have someone hold them steady while you secure them together. Pre-drill holes for the screws to prevent the wood from splitting, and then screw together using 3-inch wood screws.
- Add diagonal supports: To reinforce the structure, cut two 2×2 pieces of wood at a 45-degree angle. Secure one from the bottom corner of one vertical piece up to the halfway mark of the opposite top horizontal piece, and repeat the same process on the other side. The diagonal supports will add extra stability and prevent the frame from swaying in the wind.
- Secure the frame: If adding the trellis to an existing structure, use L-brackets or screws to attach the top and bottom horizontal pieces to the structure. For freestanding trellises, use a post digger to dig two holes deep enough to support the trellis frame. Place one post in each hole and use cement to secure them. Then, attach the trellis frame to the posts with screws or brackets, ensuring the frame is level.
Once completed, your trellis frame is ready for the next stage of construction. Adding supports and crossbeams will further strengthen the trellis, ensuring its longevity and stability.
Adding Supports and Crossbeams: Strengthening Your Trellis
Now that you’ve built the frame of your trellis, it’s time to add supports and crossbeams to strengthen it. These additions will provide the necessary stability to support your climbing plants as they grow.
Trellis Supports: There are a few different methods for attaching supports to the frame of the trellis. One popular option is to use trellis netting, which can be attached to the frame using zip ties or twine. Another option is to install metal or wooden support stakes along the sides of the trellis frame. These stakes can be pounded into the ground for added stability and then secured to the frame using screws or nails.
Trellis Crossbeams: Once your supports are in place, it’s time to install crossbeams. These horizontal beams will provide additional strength and support to the trellis. You can use wooden or metal beams, depending on your preference. Measure the length needed for each beam and cut them to size using a saw. Then, position each beam horizontally across the trellis, ensuring that it is level and centered between the supports. Secure each beam to the supports using screws or nails.
By adding supports and crossbeams to your trellis, you’re ensuring that it can support the weight of your climbing plants and withstand the elements. With these additions, your trellis will be both functional and beautiful. The next step is to maintain and care for your trellis, which we’ll cover in the next section.
Maintenance and Care: Ensuring Longevity of Your Trellis
Now that your trellis is up and supporting your climbing plants, it’s important to perform regular maintenance to keep it in excellent condition. By following these simple steps, you can ensure the longevity of your trellis:
- Inspect your trellis regularly: Check for any signs of damage, such as cracks, rot, or loose screws. Catching these issues early will prevent them from worsening.
- Clean your trellis: Use a soft brush or cloth to gently remove dirt, debris, and plant residue from the structure. This will prevent buildup and avoid any potential damage.
- Perform routine repairs: If you notice any damage, such as cracks or loose screws, make repairs as soon as possible. Use weather-resistant outdoor sealant to patch any holes or cracks.
- Protect your trellis: During harsh weather conditions, such as strong winds or heavy rain, protect your trellis by covering it with a tarp or moving it to a sheltered area.
If you perform regular maintenance and address any issues promptly, your trellis should last for years to come.
Common Trellis Issues and How to Address Them
Even with proper maintenance, issues with your trellis may still arise. Here are some common problems and how to address them:
| Issue | Solution |
|---|---|
| Slanted or leaning trellis | Reposition the trellis and ensure it’s anchored securely to the ground or an existing structure. |
| Broken or rotten wood | Replace any damaged parts with new, weather-resistant wood and sealant. Sand and repaint the entire structure if necessary. |
| Sagging crossbeams or supports | Reinforce the structure with additional supports or crossbeams. |
By addressing these issues promptly, you can ensure the structural integrity and longevity of your trellis.
FAQ
Q. How do you make a homemade trellis?
A. Building a homemade trellis is easier than you may think. Follow our step-by-step instructions in Section 7 to learn how to create a sturdy trellis frame and add supports for climbing plants.
Q. What are the benefits of having a DIY trellis in your garden?
A. Incorporating a homemade trellis in your garden brings numerous advantages. From maximizing space and improving plant health to adding visual interest and creating privacy, a trellis enhances the overall beauty and functionality of your garden. Read more about it in Section 2.
Q. What tools and materials do I need to build a trellis?
A. Section 3 provides a comprehensive list of essential tools and materials required for building a trellis. Gather these items before you begin your DIY project to ensure a smooth construction process.
Q. How do I plan and design my trellis?
A. Creating a blueprint for your trellis is crucial to its success. Section 4 outlines the process of planning and designing your trellis, considering factors such as size, shape, and style.
Q. How do I choose the right location for my trellis?
A. The location of your trellis greatly affects its effectiveness. In Section 5, we provide guidance on finding the ideal spot, taking into consideration factors like sunlight, plant requirements, and structural support.
Q. What are the different types of trellis designs?
A. Section 6 explores various trellis designs, from simple structures to intricate patterns. Learn about the features and uses of each design to choose one that suits your garden and plant preferences.
Q. How do I build a sturdy trellis frame?
A. Follow our step-by-step instructions in Section 7 to learn how to build a sturdy trellis frame. We guide you through cutting and assembling the main frame components, as well as securing it to the ground or an existing structure.
Q. How do I strengthen my trellis with supports and crossbeams?
A. Section 8 provides guidance on adding supports and crossbeams to enhance the stability and strength of your trellis. Discover different methods for attaching supports to the frame and learn how to install crossbeams for added support.
Q. How do I maintain and care for my trellis?
A. Proper maintenance is key to ensuring the longevity of your trellis. Section 9 shares regular maintenance practices to keep your trellis in excellent condition. Additionally, we offer troubleshooting tips and guidance for making necessary repairs.
Q. What plants are suitable for climbing and trellising?
A. Choosing the right plants is essential for a successful trellis. Look for climbing plants that are known to thrive on trellises, such as clematis, roses, and cucumbers. Section 9 provides further guidance on selecting plants and offers tips on proper plant placement and spacing.
Conclusion
With your newly built trellis, you’re now on your way to creating a beautiful and functional garden oasis. Your plants will love the extra support, and you’ll love the added privacy and visual interest your trellis brings to your outdoor space.
Remember to keep up with regular maintenance to ensure the longevity of your trellis. Keep an eye out for any damage or wear and tear, and make necessary repairs as soon as possible. With a little bit of care, your trellis will continue to be a valuable addition to your garden for years to come.
We hope you found this comprehensive guide useful and informative. If you have any questions or feedback, feel free to leave a comment below. Happy gardening!


