

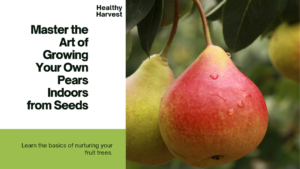
Have you ever dreamed of plucking plump, juicy pears straight from your own indoor garden? With a little know-how and patience, you can turn that dream into a reality. In this article, we will guide you through the process of growing your own pear tree from seed indoors, allowing you to enjoy the satisfaction of homegrown pears right in your living space.
Key Takeaways:
- Learn how to successfully grow pear trees from seed indoors.
- Discover the benefits of indoor cultivation.
- Choose the right variety of pear seeds for optimal growth.
- Master the techniques for preparing and planting pear seeds.
- Learn how to care for your pear seedlings to ensure healthy growth.
Introduction to Growing Pears Indoors from Seeds
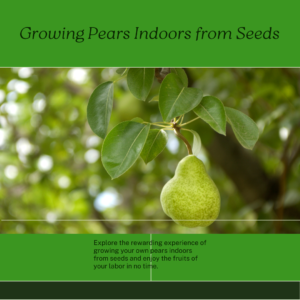
Before you start, let’s explore why growing pears indoors from seeds can be a rewarding experience. Growing pears indoors gives you the opportunity to have fresh, flavorful pears right at your fingertips throughout the year. Whether you live in a climate that is unsuitable for outdoor pear cultivation or simply want to enjoy the benefits of indoor gardening, this guide will show you how to successfully grow your own pear tree from seed.
“Growing pears indoors from seeds offers numerous advantages, making it an appealing option for both novice and experienced gardeners.”
One of the primary benefits of growing pears indoors is the ability to control the growing conditions. You can create a tailored environment that meets the specific needs of the pear tree, resulting in optimal growth and fruit production. Additionally, indoor cultivation allows you to protect your pear tree from harsh weather conditions and potential pests, ensuring a healthier and more productive plant.
Another advantage is the flexibility it provides. By growing pears indoors, you can extend the growing season and enjoy the fruits of your labor all year round. Say goodbye to relying on store-bought, often tasteless pears and hello to the satisfaction of picking ripe, succulent pears from your own indoor orchard.
Not only is growing pears indoors a practical and convenient way to enjoy fresh produce, but it also offers a sense of accomplishment and connection to nature. Witnessing the growth and development of your pear tree, from a tiny seed to a flourishing plant, can be incredibly rewarding.
Benefits of Growing Pears Indoors:
- Controlled growing conditions
- Protection from weather and pests
- Extended growing season
- Access to fresh, flavorful pears year-round
- Sense of accomplishment and connection to nature
Discover the step-by-step process of growing pears indoors from seeds in the following sections. We’ll cover everything from choosing the right variety of pear seeds to caring for your seedlings and harvesting the delicious fruits. Let’s get started on your journey to becoming a successful indoor pear gardener!
| BENEFITS OF GROWING PEARS INDOORS |
|---|
| Controlled growing conditions |
| Protection from weather and pests |
| Extended growing season |
| Access to fresh, flavorful pears year-round |
| Sense of accomplishment and connection to nature |
Basic Requirements for Growing Pears Indoors
To successfully grow pears indoors, proper attention to the basic requirements is crucial. Creating the right environment for your seedlings will help ensure healthy growth and abundant fruit production. Consider the following factors:
Light
Pears require a minimum of six hours of direct sunlight each day to thrive. If your indoor space doesn’t receive adequate natural light, supplement with grow lights. Position the lights about 12-18 inches away from the plants to provide sufficient brightness.
Temperature
Maintain a temperature range of 60-70°F (15-21°C) during the day and slightly cooler temperatures at night. Pears prefer a cool, but not cold, environment for optimal growth. Avoid exposing your plants to extreme fluctuations in temperature.
Soil
Choose a well-draining potting mix that provides good aeration for the pear roots. A mix containing a combination of peat moss, perlite, and compost is ideal. Keep the soil consistently moist but not waterlogged, as excessive moisture can lead to root rot.
Container Size
Use a container that is at least 8-12 inches deep and wide, allowing enough room for the pear tree’s extensive root system. A larger container will provide better stability and support for the growing tree.
Pro Tip: Consider using a container with drainage holes to prevent waterlogging and promote healthy root growth.
By providing the right lighting, temperature, soil, and container size, you can create an optimal environment for growing pears indoors. These basic requirements will give your pear seedlings the best possible start for healthy and fruitful growth.
Choosing the Right Variety of Pear Seeds
Selecting the right variety of pear seeds is crucial for indoor cultivation. When choosing pear seeds for your indoor garden, it’s important to consider factors such as flavor, size, and growth characteristics. To help you make an informed choice, here are some popular pear varieties that thrive indoors:
D’Anjou Pear
The D’Anjou pear is known for its juicy texture and mild, sweet flavor. This variety is highly adaptable and grows well in containers. It thrives in moderate temperatures and requires regular watering to ensure optimal growth. The D’Anjou pear tree can reach a height of up to 15 feet, but can be pruned to a smaller size for indoor cultivation.
Bartlett Pear
The Bartlett pear is one of the most popular pear varieties for both indoor and outdoor cultivation. It is known for its crisp texture and sweet, aromatic flavor. The Bartlett pear tree is highly productive and can reach a height of up to 20 feet. However, it can be kept smaller with regular pruning. It requires adequate sunlight and well-draining soil to thrive indoors.
Comice Pear
The Comice pear is prized for its buttery texture and rich, sweet flavor. This variety is well-suited for indoor growing due to its compact size and adaptability. The Comice pear tree can reach a height of up to 10 feet, making it an ideal choice for smaller indoor spaces. It requires moderate sunlight and regular watering to flourish.
These are just a few examples of popular pear varieties for indoor growing. Each variety offers its own unique flavor and characteristics, so be sure to choose the one that aligns with your preferences and growing conditions. Now that you know more about choosing the right variety of pear seeds, you can confidently embark on your indoor gardening journey.
| Pear Variety | Flavor | Size | Growth Characteristics |
|---|---|---|---|
| D’Anjou Pear | Mild, sweet | Up to 15 feet | Highly adaptable, requires regular watering |
| Bartlett Pear | Sweet, aromatic | Up to 20 feet | Highly productive, requires sunlight and well-draining soil |
| Comice Pear | Rich, sweet | Up to 10 feet | Compact size, requires moderate sunlight and regular watering |
Preparing and Planting Pear Seeds
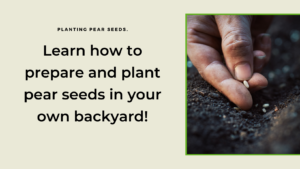
Proper preparation of pear seeds is crucial to maximize their germination rates and ensure successful growth. By following a few key steps, you can greatly enhance the chances of your pear seeds thriving.
Extracting and Cleaning the Seeds
The first step in preparing pear seeds for planting is to carefully extract them from ripe pears. Choose fully mature pears and cut them open to reveal the seeds. Use a spoon or your fingers to gently remove the seeds from the flesh, being careful not to damage them.
Once you have extracted the seeds, it’s important to clean them thoroughly. Rinse the seeds under cool running water to remove any remaining pulp or debris. This will help prevent mold or fungal growth during the germination process.
Treating the Seeds
Treating pear seeds before planting can significantly improve their chances of successful growth. One effective method is stratification, which involves exposing the seeds to a period of cold and moisture to simulate winter conditions.
To stratify pear seeds, place them in a damp paper towel or peat moss inside a sealable plastic bag. Store the bag in the refrigerator for about 6-8 weeks. This cold period will break the seeds’ dormancy and encourage germination when planted.
Planting Pear Seeds
After the stratification period, it’s time to plant the treated pear seeds. Choose a well-draining potting mix or seed-starting mix and fill a seed tray or small pots with the soil. Make sure the containers have drainage holes to prevent waterlogging.
Plant the pear seeds about 1 inch deep into the soil, spacing them apart to allow room for growth. Lightly cover the seeds with soil and gently water the containers to moisten the soil. Place the trays or pots in a warm location with indirect sunlight.
Keep the soil consistently moist but not waterlogged during the germination process. Once the seedlings emerge, provide them with adequate light to promote healthy growth.
| Step | Actions |
|---|---|
| 1 | Extract the seeds from ripe pears |
| 2 | Clean the seeds by rinsing them under cool water |
| 3 | Stratify the seeds by storing them in the refrigerator for 6-8 weeks |
| 4 | Plant the stratified seeds about 1 inch deep in a well-draining potting mix |
| 5 | Keep the soil consistently moist and provide adequate light for seedling growth |
Following these preparation and planting techniques will set a strong foundation for your indoor pear seedlings. In the next section, we will discuss how to provide the best care for your pear seedlings to ensure their healthy development.
Planting and Caring for Pear Seedlings
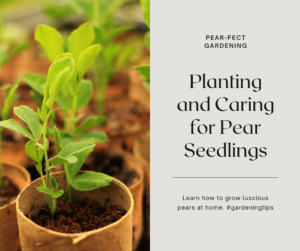
Now that your pear seeds have germinated, it’s time to focus on the next crucial step: planting and caring for your seedlings. By providing the right conditions and nurturing your pear seedlings, you can ensure their strong and healthy growth.
Watering:
Water is essential for the development of your pear seedlings. Keep the soil consistently moist, but avoid overwatering, as it can lead to root rot. Monitor the moisture levels by gently inserting your finger into the soil. If it feels dry about an inch below the surface, it’s time to water. Remember to water slowly and deeply to encourage deep root growth.
Fertilizing:
Providing your pear seedlings with the right nutrients is crucial for their overall health. Start by applying a balanced, slow-release fertilizer when the seedlings have developed their first set of true leaves. Follow the dosage instructions on the fertilizer package and apply it evenly around the base of the seedlings. Supplement with additional fertilizer every four to six weeks during the growing season to promote optimum growth.
Pruning:
Pruning plays a significant role in shaping your pear seedlings and encouraging strong branching. After the seedlings have established a few sets of true leaves, you can start pruning them. Remove any weak or damaged branches, as well as those that compete for space and sunlight. This will help redirect the plant’s energy into developing healthy, productive branches. Remember to use clean, sterilized pruning tools to prevent the spread of diseases.
Tip: If your pear seedlings are growing in pots, consider repotting them into larger containers with well-draining soil once they outgrow their current pots. This will provide more space for root development and support their continued growth.
Proper care and attention during the early stages are crucial for the long-term success of your pear seedlings. By watering, fertilizing, and pruning your seedlings correctly, you’ll set the foundation for healthy growth and bountiful harvests in the future.
| Task | Timing |
|---|---|
| Watering | Consistently keep the soil moist |
| Fertilizing | Apply a balanced, slow-release fertilizer after the first true leaves appear, and supplement every 4-6 weeks |
| Pruning | Begin pruning after a few sets of true leaves have formed, removing weak or damaged branches and those competing for space and sunlight |
Pruning and Training Your Indoor Pear Tree
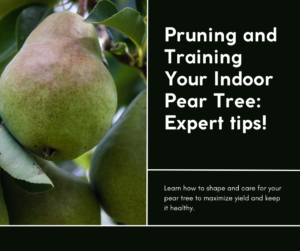
Pruning plays a vital role in shaping your indoor pear tree and maximizing fruit production. Understanding the importance of pruning and employing effective training techniques will help you create a tree that not only looks visually appealing but also yields abundant and delicious pears.
When it comes to indoor pear tree growth, pruning serves multiple purposes. Firstly, it helps maintain the tree’s desired shape and size, ensuring it fits perfectly in your indoor space. Pruning also allows for better airflow and sunlight penetration, reducing the risk of disease and promoting overall tree health.
Furthermore, regular pruning stimulates the growth of new branches and encourages fruitful production. By removing excess branches and focusing the tree’s energy on specific areas, you can increase the number and quality of pears your tree produces.
There are a few essential techniques to keep in mind when pruning and training your indoor pear tree:
- Formative Pruning: During the early stages of your tree’s growth, focus on shaping the branches to develop a strong and balanced structure. Remove any competing branches or those that grow too close together. This process will help establish a well-structured tree that can support the weight of abundant fruit.
- Maintenance Pruning: Once your tree has reached its desired shape and size, continue to maintain its structure by pruning annually. Remove any dead, damaged, or crossing branches. Thin out overcrowded areas to allow for better airflow and prevent the spread of diseases. This will also promote better fruit quality and size.
- Training Techniques: Training your indoor pear tree involves guiding its growth to a specific form or structure. Common training techniques include using stakes, trellises, or espalier systems. Choose the method that suits your space and preferences, ensuring you provide adequate support for your tree’s branches as they bear fruit.
Remember, the timing of your pruning is crucial. It’s best to prune your indoor pear tree during its dormant period, typically in late winter or early spring before new growth begins. This allows the tree to recover and heal wounds before the active growing season.
Expert Tip:
Always use clean, sharp pruning tools to ensure smooth cuts and minimize the risk of infection. Disinfect your tools between cuts to prevent the spread of diseases.
By mastering the art of pruning and training, you can create a visually appealing, well-structured indoor pear tree that yields abundant and delicious fruit. So grab your pruning shears and get ready to shape your tree into a stunning centerpiece in your indoor garden!
Benefits of Pruning and Training Your Indoor Pear Tree
| Benefits | Description |
|---|---|
| Promotes Fruit Production | Pruning channels the tree’s energy into fruit-bearing branches, resulting in increased yield and improved fruit quality. |
| Enhances Tree Health | Proper pruning improves airflow and reduces the risk of disease by eliminating crowded and overlapping branches. |
| Shapes the Tree | Training techniques like espalier or trellises allow you to shape the tree to fit your indoor space and desired aesthetic. |
| Reduces Maintenance | Regular maintenance pruning prevents the tree from becoming overly dense, making it easier to manage and harvest. |
Harvesting and Enjoying Your Homegrown Pears
After patiently nurturing your pear tree, the time has finally come to harvest and savor the fruits of your labor. By knowing when to pick your homegrown pears and following a few simple tips, you can ensure that they are ripe, flavorful, and ready to enjoy.
Signs of Pear Ripeness
- Color: A change in color is an indicator of ripeness. Look for pears that have a mature color, typically a yellow or golden hue. However, keep in mind that the color can vary depending on the variety.
- Firmness: Gently press the pear near the stem. It should yield slightly to your touch without being too soft or mushy. Avoid pears that are too hard as they may not have fully ripened.
- Aroma: Smell the base of the pear near the stem. A sweet, fragrant aroma indicates ripeness.
- Texture: Ripe pears will have a smooth and slightly velvet-like skin. Avoid pears with wrinkled or bruised skin.
Harvesting Tips
When it comes to harvesting your homegrown pears, timing is crucial. Follow these simple tips to ensure a successful harvest:
- Check the color and firmness of the pears to determine their ripeness. Use the signs mentioned above as a guide.
- Hold the pear near the stem with one hand and gently twist it. If the pear detaches from the tree easily, it is ready to be picked.
- Place harvested pears in a shallow basket or tray to prevent them from getting bruised.
- Handle the pears with care to avoid any damage.
Now that you’ve successfully harvested your homegrown pears, you have the opportunity to enjoy their fresh, juicy flavor. Whether you choose to bite into a ripe pear straight from the tree or incorporate them into your favorite recipes, the satisfaction of enjoying your own harvest is unparalleled.
| Pear Variety | Harvest Time | Flavor Profile |
|---|---|---|
| Bartlett | August to September | Sweet and juicy |
| Anjou | August to November | Smooth and mild |
| Bosc | September to December | Rich and sweet |
Delicious Ways to Enjoy Your Homegrown Pears
Now that you’ve successfully grown your own pears indoors, it’s time to savor the fruits of your labor. Whether you prefer sweet or savory, there are endless delicious ways to enjoy the flavors of your homegrown pears. From refreshing salads to decadent desserts, here are some mouthwatering recipes and ideas that will elevate your pear-eating experience:
1. Pear and Spinach Salad:
Create a refreshing and nutritious salad by combining fresh baby spinach leaves with slices of juicy homegrown pears. Top it off with some crumbled feta cheese, toasted walnuts, and a drizzle of balsamic vinaigrette for a perfect balance of flavors.
2. Caramelized Pear Tart:
Indulge in the sweet goodness of a caramelized pear tart. Thinly slice your homegrown pears and arrange them beautifully on a bed of buttery puff pastry. Sprinkle some brown sugar and cinnamon on top and bake until golden brown. Serve it warm with a dollop of vanilla ice cream for an irresistible treat.
3. Spiced Pear Chutney:
Add a burst of flavor to your meals with homemade spiced pear chutney. Combine diced homegrown pears with onions, ginger, garlic, and a blend of aromatic spices like cinnamon, cloves, and black pepper. Simmer it gently until the flavors meld together, and enjoy it as a condiment with cheese, crackers, or roasted meats.
4. Grilled Pear and Prosciutto Crostini:
Elevate your appetizer game with these delectable crostini. Grill slices of your homegrown pears until they are caramelized and tender. Spread some creamy goat cheese on toasted baguette slices, top with a slice of prosciutto, and finish it off with the grilled pear. Drizzle a touch of honey for a delightful combination of sweet, salty, and savory flavors.
5. Pear and Ginger Smoothie:
Start your day off right with a refreshing pear and ginger smoothie. Blend ripe homegrown pears with Greek yogurt, a hint of ginger, a squeeze of lemon juice, and a handful of spinach for an energizing and nutritious breakfast option.
These are just a few examples of the many delicious ways to enjoy your homegrown pears. Let your creativity guide you as you experiment with different flavors and ingredients to create unique dishes that showcase the natural sweetness and versatility of your homegrown harvest. Bon appétit!
FAQ
Q. What are the benefits of growing pears indoors from seeds?
A. Growing pears indoors from seeds allows you to have fresh, flavorful pears throughout the year. It also gives you control over the growing conditions and eliminates the need for outdoor space.
Q. What are the basic requirements for growing pears indoors?
A. To successfully grow pears indoors, you need to provide adequate light, maintain a consistent temperature, use well-draining soil, and choose an appropriate container size for your pear tree.
Q. How do I choose the right variety of pear seeds for indoor growing?
A. When choosing pear seeds for indoor cultivation, consider factors such as flavor, size, growth characteristics, and compatibility with indoor growing conditions. Some popular pear varieties for indoor growing include Bartlett, Anjou, and Comice.
Q. How do I prepare and plant pear seeds?
A. To prepare pear seeds for planting, extract them from the fruit, clean off any pulp, and treat them to increase germination rates. Once prepared, plant the seeds in a well-draining potting mix, water them, and provide suitable growing conditions.
Q. How do I care for pear seedlings?
A. Proper care for pear seedlings involves watering them regularly, providing sufficient light and temperature conditions, fertilizing them with a balanced fertilizer, and pruning them to promote healthy growth.
Q. Why is pruning important for indoor pear tree growth?
A. Pruning is essential for shaping your indoor pear tree and promoting better fruit production. It helps to remove dead or diseased branches, manage the size of the tree, and improve airflow and light penetration.
Q. How do I harvest homegrown pears?
A. Homegrown pears are ready for harvest when they are firm and have a good color. They should come off the tree with a gentle twist. Harvest the pears and store them in a cool, dry place for a few days to ripen fully.
Q. What are some delicious ways to enjoy homegrown pears?
A. There are countless ways to enjoy homegrown pears! You can eat them fresh, slice them into salads, bake them into pies or tarts, make pear sauce or jam, or even poach them in wine for a decadent dessert.
Conclusion
In conclusion, growing pears indoors from seeds is a rewarding adventure that allows you to enjoy fresh, flavorful fruits right in your own living space. With the right knowledge and dedication, you can create an indoor pear tree that yields delicious fruits year-round.
By understanding the basic requirements and selecting the right variety of pear seeds, you can ensure the success of your indoor cultivation. Preparing and planting the pear seeds properly will increase germination rates and lead to strong and healthy seedlings.
Caring for your pear seedlings through proper watering, fertilizing, and pruning techniques is crucial for their growth and development. Pruning and training your indoor pear tree not only shapes its form but also enhances fruit production.
When the time comes, harvest your homegrown pears at their peak of ripeness and discover the joy of savoring the fruits of your labor. Explore various delicious ways to enjoy your homegrown pears, from fresh salads to mouthwatering desserts.
Start your journey of growing pears indoors today and experience the delight of having flavorful, homegrown fruits at your fingertips throughout the year. Happy cultivating!


