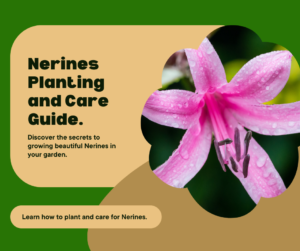
Welcome to our comprehensive guide on planting, caring for, and propagating Nerines. Whether you’re a seasoned gardener or just starting out, this article will provide you with all the information you need to successfully grow these vibrant flowers in your own garden.
Nerines are known for their stunning beauty and delicate charm. Native to South Africa, these flowers offer a wide range of colors, from vibrant pinks and reds to soft pastels. Their tall, slender stalks and clusters of trumpet-shaped blooms make them a popular choice for both garden beds and cut flower arrangements.
Planting Nerines requires some careful consideration, from choosing the right location to providing the ideal growing conditions. With the right knowledge and techniques, you can enjoy the beauty of these flowers year after year.
Key Takeaways
- Nerines are vibrant flowers native to South Africa and offer a wide range of colors.
- Choose a suitable location for planting Nerines to ensure optimal growth.
- Provide proper watering and moisture to keep Nerines healthy.
- Learn how to fertilize and prune Nerines for enhanced growth and beauty.
- Identify and treat common pests and diseases that can affect Nerines.
Introduction to Nerines
Before diving into the specifics of planting and caring for Nerines, let’s take a moment to explore an overview of these remarkable flowers. Nerines are known for their striking beauty and are prized by gardeners for their vibrant colors and elegant form.
Originating from South Africa, these bulbous plants belong to the Amaryllidaceae family and are closely related to lilies. They are commonly referred to as “Guernsey lilies” or “Jersey lilies” due to their popularity in the Channel Islands.
Nerines are available in various shades, including shades of pink, red, white, and orange. Their delicate petals and long, slender stems make them an eye-catching addition to any garden or floral arrangement.
So why should you consider growing Nerines? Apart from their sheer beauty, these flowers offer numerous benefits that make them an excellent choice for avid gardeners:
- Hardiness: Nerines thrive in a range of climates and can tolerate both cold and mild conditions, making them adaptable and resilient.
- Long Bloom Period:The flowering period of Nerines extends from late summer to early autumn, providing a burst of color in the garden when other plants may be fading.
- Low Maintenance: These flowers require minimal care once established, making them ideal for both experienced gardeners and beginners.
- Attracts Pollinators: The nectar-rich blooms of Nerines are a magnet for pollinators, such as bees and butterflies, contributing to a vibrant and biodiverse garden ecosystem.
- Floral Arrangements: Nerines make stunning cut flowers, enhancing indoor spaces with their elegance and adding a touch of natural beauty to displays.
Whether you’re seeking a focal point in your garden or looking to enhance your floral arrangements, Nerines offer a wealth of possibilities.
Nerine Varieties and their Characteristics
| Variety | Characteristics |
|---|---|
| Nerine bowdenii | Deep pink flowers, long-lasting blooms |
| Nerine sarniensis | Wide range of colors, including red, pink, white, and orange; large blooms |
| Nerine filamentosa | White flowers with greenish-yellow stamens; fragrant blooms |
| Nerine humilis | Soft pink flowers, compact growth habit |
| Nerine undulata | Pale pink flowers with fringed petals |
Choosing the Right Location for Nerines
The success of begins with selecting the right location. Providing your Nerines with the ideal conditions will create the perfect environment for them to thrive and display their vibrant blooms.
When choosing a location for your Nerines, consider the following factors:
- Sunlight: Nerines thrive in full sun, so it’s essential to choose a spot in your garden that receives at least 6-8 hours of direct sunlight each day. This will ensure optimal growth and flower production.
- Soil: Nerines prefer well-draining soil with a slightly acidic to neutral pH level. Before planting, dig and amend the soil with organic matter to improve its structure and drainage.
- Protection: While Nerines enjoy the sun, they are also delicate flowers that can be damaged by strong winds. Plant them in a location that provides some protection, such as a sheltered corner of your garden or near a windbreak.
To visualize the ideal growing conditions for Nerines, refer to the following table:
Remember, the right location is crucial for the long-term health and beauty of your Nerines. By providing them with adequate sunlight, well-draining soil, and protection from strong winds, you’ll set them up for success.
Steps for Planting Nerines
Planting Nerines is a rewarding experience that can brighten up any garden. Follow these simple steps to ensure a healthy start for your Nerines:
- Choose the right time: Nerine bulbs are best planted in late summer or early autumn. This gives them enough time to establish their roots before the colder months.
- Prepare the soil: Nerines prefer well-draining soil. Make sure the planting area is free from weeds and debris. Mix in some organic matter to improve the soil’s fertility and drainage.
- Dig the holes: Dig holes that are approximately 6 to 8 inches deep and 4 to 6 inches apart. This will provide enough space for the bulbs to grow and spread.
- Place the bulbs: Gently place each bulb into the holes, with the pointed end facing upwards. Make sure the bulbs are positioned at the right depth, as planting them too shallow or too deep can affect their growth.
- Backfill the holes: Carefully fill the holes with soil, ensuring that the bulbs are adequately covered. Pat down the soil gently to eliminate air pockets.
- Water thoroughly: After planting, give the Nerines a thorough watering to settle the soil and provide moisture to the bulbs.
- Mulch: Apply a layer of mulch around the planted Nerines to help retain moisture and suppress weed growth. Keep the mulch a few inches away from the stems to prevent rotting.
By following these steps, you’ll set the stage for beautiful Nerines to flourish in your garden.
“A garden requires patient labor and attention. Plants do not grow merely to satisfy ambitions or to fulfill good intentions. They thrive because someone expended effort on them.” – Liberty Hyde Bailey
Watering and Moisture Requirements for Nerines
Proper watering is crucial for the health and longevity of your Nerines. These beautiful flowers have specific moisture requirements that need to be met in order for them to thrive. By understanding how to properly hydrate your Nerines, you can ensure their vibrant beauty lasts throughout the growing season.
Nerines prefer moist but well-draining soil. Overwatering can lead to root rot and other issues, while underwatering can cause the flowers to dry out and wither. To strike the right balance, follow these watering guidelines:
- When planting Nerines, make sure the soil is adequately moist. This will help the bulbs establish a strong root system.
- During the active growth period, which is typically in spring and fall, water your Nerines regularly. Provide enough water to keep the soil consistently moist, but avoid waterlogging.
- In hot, dry weather, increase the frequency of watering to prevent the soil from drying out completely. Consider watering your Nerines twice a week during these conditions.
- Monitor the moisture levels of your Nerines’ soil. Stick your finger about 1 inch deep into the soil. If it feels dry, it’s time to water.
- Reduce watering in the winter months when Nerines go dormant. During this period, the bulbs require less moisture, but make sure the soil doesn’t dry out completely.
Remember to adjust your watering routine based on the specific climate and conditions in your area. Factors such as rainfall and humidity levels will impact the watering needs of your Nerines.
Proper watering is crucial for the health of Nerines. Understand the specific moisture requirements of these flowers and learn how to ensure they receive adequate hydration throughout the growing season.
In addition to regular watering, it’s important to monitor the moisture levels of the soil. Over time, soil conditions can change, affecting the ability of the plants to absorb water. To maintain optimal moisture levels, consider the following tips:
- Mulching: Apply a layer of organic mulch, such as compost or bark chips, around the base of your Nerines. Mulch helps to retain moisture in the soil and prevent evaporation.
- Grouping: Planting Nerines in groups or clusters can create a microclimate that helps to conserve moisture. The plants provide shade and create a humid environment, reducing water loss through evaporation.
- Watering in the morning: Water your Nerines in the early morning to allow sufficient time for the foliage to dry before nightfall. Wet leaves in the evening can promote the growth of fungal diseases.
By following these watering and moisture management practices, you can provide the optimal conditions for your Nerines to flourish and showcase their vibrant colors. Remember, caring for Nerines involves more than just beautiful flowers—it requires nurturing their fundamental needs, including proper hydration.
| Watering Tips for Nerines | Moisture Management Techniques |
|---|---|
| 1. Plant Nerines in moist soil during the initial planting. | 1. Apply organic mulch to retain moisture in the soil. |
| 2. Regularly water Nerines during the active growth period. | 2. Group Nerines together to create a microclimate that conserves moisture. |
| 3. Increase watering frequency in hot and dry weather. | 3. Water Nerines in the morning to allow leaves to dry before nightfall. |
| 4. Monitor soil moisture regularly to prevent waterlogging or dryness. | |
| 5. Reduce watering in winter when Nerines go dormant. |
Fertilizing and Pruning Nerines
Proper fertilizing and pruning techniques play a vital role in the growth and appearance of your Nerines. Implementing these best practices will help your plants flourish and maintain their stunning beauty.
Fertilizing Nerines
Nerines benefit from regular fertilization to provide them with essential nutrients for vigorous growth. Apply a balanced, slow-release fertilizer with equal parts nitrogen (N), phosphorus (P), and potassium (K), such as a 10-10-10 or 15-15-15 formula. Follow the manufacturer’s instructions for application rates and timing.
Start fertilizing your Nerines in early spring, just as new growth emerges. Apply the fertilizer evenly around the base of the plants, taking care not to let it touch the foliage or flowers. Gently work the fertilizer into the topsoil and water thoroughly to allow the nutrients to penetrate the root zone.
During the growing season, repeat the fertilization process every six to eight weeks to provide a consistent supply of nutrients. However, avoid fertilizing within six weeks of the first anticipated frost date to prevent tender new growth from being damaged by colder weather.
Pruning Nerines
Pruning Nerines helps maintain their shape, improves air circulation, and encourages blooming. Wait until the flowers fade and the foliage starts to turn yellow after the blooming period before pruning.
Using clean, sharp pruning shears, remove the faded flower stalks close to the base of the plant. Be careful not to damage any healthy leaves or new emerging growth. Additionally, trim back any yellow or withered leaves to keep the plant looking tidy.
Tip: Pruning Nerines immediately after flowering allows the plants to redirect energy into bulb development, ensuring bigger and better blooms next season.
Remember to clean your pruning tools with a disinfectant solution before and after each use to minimize the risk of spreading diseases.
| Fertilizing Nerines | Pruning Nerines |
|---|---|
|
|
Identifying and Treating Pest Infestations in Nerines
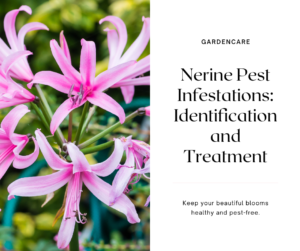
Unfortunately, even the hardiest of plants like Nerines can fall victim to common pests and diseases. It’s important to be able to identify these issues early on and take effective measures to treat and prevent infestations, allowing your Nerines to thrive pest-free.
Common Pests and Diseases
Nerines are susceptible to various pests and diseases that can hinder their growth and overall health. Some of the most common pests that affect Nerines include:
- Aphids: These small insects feed on the sap of plants, causing distorted growth and yellowing leaves.
- Spider mites: These tiny pests spin webs on the undersides of leaves and suck the sap, resulting in discolored and stunted growth.
- Snails and slugs: These slimy creatures can chew through Nerine leaves and flowers, leaving behind unsightly holes.
Aside from pests, Nerines can also be susceptible to diseases such as:
- Botrytis blight: This fungal disease causes brown spots and decay on the leaves, stems, and flowers of Nerines.
- Root rot: Overwatering or poorly drained soil can lead to root rot, resulting in yellowing leaves and wilting plants.
- Viral infections: Viruses can cause streaking or mottling on the leaves of Nerines, impacting their overall appearance.
Identifying Pest Infestations
Regularly inspecting your Nerines can help you catch pest infestations early. Look out for the following signs of pest presence:
- Visible insects or their eggs on the leaves or stems.
- Distorted growth, curled leaves, or yellowing foliage.
- Webs or fine silk threads on the undersides of leaves indicating spider mite infestations.
- Chewed or damaged leaves and flowers caused by slugs and snails.
Treating and Preventing Pest Infestations
When it comes to treating pest infestations in Nerines, there are several methods you can employ:
- Manual Control: Handpick and remove pests like aphids, snails, and slugs from your Nerines. Dispose of them far away from your garden.
- Natural Predators: Introduce beneficial insects like ladybugs and lacewings that feed on pests.
- Insecticidal Soap: Use an insecticidal soap specifically formulated for plant pests to control aphids and spider mites.
Taking preventive measures is also crucial to keep pests at bay:
- Implement good garden hygiene by removing any plant debris or fallen leaves that may harbor pests.
- Encourage a diverse ecosystem in your garden by planting companion plants that repel pests.
- Regularly inspect your Nerines for signs of pests and act promptly to prevent infestations from spreading.
By being vigilant and proactive in identifying and treating pest infestations, you can ensure your Nerines remain healthy and beautiful, gracing your garden with their vibrant colors.
Preventing Diseases in Nerines
Diseases can pose a threat to the health of your Nerines. To ensure the vibrant and vigorous growth of your flowers, it is essential to take proactive measures and precautions in preventing diseases.
1. Choose Disease-Resistant Varieties
When selecting Nerine bulbs, opt for disease-resistant varieties. These plants have been specifically bred to withstand common pests and diseases, providing an added layer of protection for your garden.
2. Provide Adequate Air Circulation
Good air circulation is essential for preventing the development and spread of diseases in Nerines. Ensure that your plants aren’t overcrowded and trim back neighboring plants or foliage that could impede airflow. This can help reduce the risk of fungal infections and promote healthier growth.
3. Maintain Proper Watering Practices
Overwatering can create a favorable environment for diseases to thrive. Be mindful of your watering practices and avoid excessive moisture around the base of your Nerine plants. Water only when the top inch of soil feels dry, and always water at the base of the plant to avoid wetting the foliage.
4. Practice Proper Sanitation
Regular cleaning and sanitation can prevent the spread of diseases in your garden. Remove any fallen leaves or plant debris that could harbor pests or disease-causing pathogens. Additionally, sterilize your gardening tools between uses to prevent cross-contamination.
5. Monitor for Signs of Diseases
Vigilance is key in preventing diseases in Nerines. Regularly inspect your plants for any signs of diseases, such as discoloration, spots, or wilting foliage. If you notice any abnormalities, take immediate action to identify the problem and apply appropriate treatments.
| Common Diseases | Prevention Tips |
|---|---|
| Botrytis Blight | Avoid overhead watering, provide proper air circulation |
| Leaf Spot | Remove and destroy infected leaves, practice crop rotation |
| Basal Rot | Ensure well-draining soil, avoid excess moisture |
| Virus Diseases | Control aphid populations, remove infected plants promptly |
Remember, prevention is always better than cure when it comes to protecting your Nerines from diseases. By following these proactive measures, you can enjoy the beauty of healthy, disease-free flowers in your garden.
Propagating Nerines
If you’re an avid gardener and want to expand your collection of Nerines, propagating these stunning flowers is a rewarding endeavor. With the right methods and a little patience, you can have more of these beautiful blooms gracing your garden. Here, we’ll explore various techniques for propagating Nerines and provide expert tips for successful propagation.
Methods for Propagating Nerines
There are several methods you can use to propagate Nerines:
- Bulb Division: One of the most common methods, bulb division involves separating offsets or bulb clusters from the parent plant. Make sure each offset has its own roots before carefully removing it from the parent bulb. Plant the offsets in well-drained soil and provide them with the same care as mature Nerines.
- Seed Propagation: If you have the time and patience, you can propagate Nerines from seeds. Start by collecting ripe seeds and soak them in water for a few hours. Plant the seeds in a well-prepared seed-raising mix and keep them moist. It may take a few years for the plants to mature and bloom, but the result is worth it.
- Leaf Cuttings: Another method is propagating Nerines from leaf cuttings. Select healthy leaves and cut them into sections, making sure each section has a vein. Plant the sections in a well-drained potting mix and keep them moist. With time and proper care, new plants will sprout from the leaf sections.
Tips for Successful Propagation
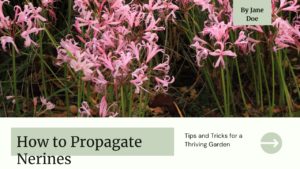
Follow these expert tips to increase your chances of successful propagation:
- Choose healthy and disease-free bulbs or plants for propagation.
- Ensure the soil or potting mix is well-drained to prevent waterlogged conditions.
- Provide the propagated Nerines with adequate sunlight, preferably in a location with full sun exposure.
- Maintain consistent moisture levels, neither allowing the soil to dry out completely nor overwatering.
- Protect the young plants from extreme weather conditions, such as frost or intense heat.
Remember, propagating Nerines requires patience. It may take some time for the new plants to establish themselves, but with proper care and attention, you’ll be rewarded with a flourishing garden filled with these exquisite flowers.
Now that you’ve learned various methods and valuable tips for propagating Nerines, it’s time to put your newfound knowledge into action. Expand your Nerine collection and enjoy the vibrant beauty of these flowers in abundance.
FAQ
Q. How do I plant Nerines?
A. To plant Nerines, choose a location with well-draining soil and full sun. Dig a hole that is slightly deeper than the bulb, place the bulb in the hole, and cover with soil. Water thoroughly and keep the soil evenly moist until the plant establishes.
Q. What are the watering and moisture requirements for Nerines?
A. Nerines prefer moderate watering. Water the plants deeply once a week, allowing the soil to dry slightly between waterings. Be careful not to overwater, as excessive moisture can lead to root rot.
Q. How do I fertilize and prune Nerines?
A. Fertilize Nerines in the spring with a balanced, slow-release fertilizer. Avoid fertilizing during the dormant period. Prune Nerines after flowering, removing any dead or damaged foliage. This helps promote healthy growth and prevents the plant from becoming overcrowded.
Q. What are some common pests that can affect Nerines?
A. Common pests that can infest Nerines include aphids, snails, and slugs. If you notice these pests, you can use organic pest control methods such as handpicking, using insecticidal soap, or creating physical barriers.
Q. How can I prevent diseases in Nerines?
A. To prevent diseases in Nerines, ensure that the plants have good air circulation and are not overcrowded. Avoid overhead watering, as this can promote fungal diseases. If you notice any signs of disease, such as discolored or wilting foliage, take immediate action to treat the plants.
Q. What are the methods for propagating Nerines?
A. Nerines can be propagated through division or by collecting and planting seeds. Division is the most common method and involves separating the bulbs and replanting them. Seeds can be collected from the dried flower heads and planted in well-draining soil.
Q. Do you have any tips for successful propagation of Nerines?
A. When dividing bulbs, ensure that each division has at least one healthy shoot and a portion of the root system. Plant the divisions at the same depth they were previously growing. When propagating from seeds, provide a warm and well-lit environment for germination, and be patient as it may take some time for the seeds to sprout.
Conclusion
Congratulations! Armed with the knowledge on planting, caring for, and propagating Nerines successfully, you are now ready to transform your garden into a haven of exquisite beauty. By following the right techniques and giving these stunning flowers some tender loving care, you can enjoy the vibrant splendor of Nerines all year round.
Whether you’ve just started your Nerine garden or are looking to expand your collection, these versatile flowers will not disappoint. From their vibrant colors to their elegant form, Nerines bring a touch of charm and sophistication to any outdoor space.
Remember to choose the perfect location for your Nerines, ensuring they receive the ideal conditions to thrive. Follow the step-by-step planting process, provide adequate watering, and employ proper fertilizing and pruning techniques to promote healthy growth.
And if the desire to multiply your Nerines blooms within you, explore the various methods of propagation and implement the expert tips shared. With patience and a little experimentation, you can propagate Nerines successfully, increasing your flower collection and sharing their beauty with others.


