

Are you a fan of flavorsome dishes? Do you love adding a dash of aromatic herbs to your culinary creations? If so, you’ve come to the right place. In this comprehensive guide, we will teach you the art of drying fresh herbs right in the comfort of your own home.
Drying herbs is a fantastic way to preserve their natural flavors and extend their shelf life. With a well-stocked supply of dried herbs, you’ll never have to compromise on taste. So, let’s dive in and explore the fascinating world of drying fresh herbs!
Key Takeaways:
- Learn how to dry fresh herbs at home.
- Discover the benefits of preserving herbs through the drying process.
- Identify the best herbs for drying and storing.
- Understand the optimal time to harvest your herbs for maximum flavor.
- Explore different methods of drying fresh herbs and choose the most suitable one for your needs.
Introduction to Drying Fresh Herbs
Before we dive into the techniques of drying fresh herbs, let’s explore why it’s important to preserve herbs and the benefits of drying them at home. Get ready to enhance the flavors of your cooking with these expert tips.
When it comes to adding depth and aroma to your dishes, fresh herbs are unbeatable. However, they often have a short shelf life, resulting in wasted herbs and diminished flavors. That’s where drying fresh herbs can be a game-changer.
Drying herbs at home allows you to:
- Preserve the unique flavors and aromas of herbs
- Extend the shelf life of your herbs
- Create a well-stocked herb pantry for year-round seasoning
- Save money compared to buying store-bought dried herbs
- Control the quality and purity of your dried herbs
By drying your own herbs, you have complete control over the process, ensuring that you’re preserving the freshness and potency of these natural flavor enhancers. Plus, the satisfaction of harvesting and drying your own herbs adds an extra layer of fulfillment to your culinary adventures.
The Benefits of Drying Herbs at Home
“Drying fresh herbs at home is a simple yet powerful technique that allows you to unlock the full potential of these aromatic plants. Not only do dried herbs add depth and complexity to dishes, but they also provide a convenient and cost-effective way to elevate your cooking.” – Chef Emma Johnson
Drying herbs at home not only ensures that you have a constant supply of flavorful seasonings but also offers numerous benefits:
- Intensified Flavors: Dried herbs concentrate their flavors, infusing dishes with a more robust taste.
- Long Shelf Life: Properly dried and stored herbs can last up to a year or even longer, giving you access to herbs all year round.
- Culinary Versatility: Dried herbs are incredibly versatile and can be used in a wide range of recipes, including soups, stews, sauces, marinades, and dressings.
- Reduced Waste: Drying herbs allows you to utilize excess harvests or save herbs before they spoil, minimizing food waste.
- Convenience: Having a variety of dried herbs readily available in your pantry saves you time and simplifies meal preparation.
Now that you understand the advantages of drying herbs at home, it’s time to explore the techniques and methods that will help you preserve the flavors of your favorite herbs for months to come.
| Benefits of Drying Herbs at Home |
|---|
| Intensified flavors |
| Long shelf life |
| Culinary versatility |
| Reduced waste |
| Convenience |
Selecting Herbs Suitable for Drying
Not all herbs are suitable for drying, so it’s important to learn which ones work best. By selecting the right herbs for drying, you can ensure a flavorful and fragrant supply that will last throughout the year. Here are some tips to help you choose the perfect herbs for drying:
1. Consider the Flavor and Aroma
When selecting herbs for drying, pay attention to their flavor and aroma. Choose herbs with robust flavors and strong scents, as these qualities tend to be preserved well during the drying process. Some popular herbs that are great for drying include:
- Thyme
- Rosemary
- Oregano
- Mint
- Lavender
- Sage
2. Check for Dryability
Certain herbs have higher moisture content and may not dry well. Avoid selecting herbs that are prone to wilting or molding when dried. Instead, opt for herbs that retain their shape and texture even after the drying process. The table below provides a comparison of some commonly used herbs and their suitability for drying:
| Herb | Dryability |
|---|---|
| Basil | Good |
| Cilantro | Fair |
| Parsley | Fair |
| Dill | Poor |
3. Consider Culinary Uses
Think about the herbs that you commonly use in your cooking. Select herbs for drying that you frequently incorporate into your recipes, as it ensures you’ll have a ready-to-use supply of dried herbs whenever needed. Additionally, choosing herbs that complement your favorite dishes can elevate the flavors and aromas of your culinary creations.
Pro Tip: If you’re unsure about the suitability of a specific herb for drying, it’s always best to experiment and see how it turns out. You might discover a new favorite herb that adds a unique touch to your cooking!
Now that you know how to select the right herbs for drying, you’ll be well on your way to creating a well-stocked herb pantry. In the next section, we’ll delve into the best time to harvest your herbs to ensure optimal flavor and aroma in your dried herbs.
Understanding the Best Time to Harvest Herbs
When it comes to drying fresh herbs, timing is everything. Harvesting your herbs at the right moment ensures maximum flavor and aroma, resulting in the best possible dried herbs. In this section, we’ll delve into the art of timing and guide you through the ideal moments to gather your herbs for drying.
Herbs are most potent and flavorful just before they bloom. At this stage, they have accumulated the highest concentration of essential oils – the key to their distinctive taste and fragrance. By harvesting your herbs before flowering, you capture their peak flavor, making them perfect for drying.
“Timing is crucial when it comes to harvesting herbs for drying.”
The exact timing of herb harvest depends on the type of herb you are working with. Some herbs should be harvested early in the morning after the dew has evaporated, while others can be harvested throughout the day. It is recommended to research the specific herbs you are growing to determine the best time for each individual variety.
Here is a general guide on the best time to harvest commonly used herbs:
| Herb | Best Time to Harvest |
|---|---|
| Basil | When the plant has developed 6-8 sets of leaves |
| Cilantro | Before it starts to flower |
| Mint | Before it flowers |
| Thyme | Just before flowering |
Remember, these are general guidelines and may vary based on your specific growing conditions and the particular variety of herb. Always observe your plants closely and trust your senses – the appearance, smell, and taste of the leaves can provide valuable cues about their readiness for harvest.
Now that you understand the importance of timing, you’re well on your way to harvesting herbs at their flavor peak. In the next section, we’ll explore the different methods of drying fresh herbs, so you can transform your harvest into a fragrant, long-lasting pantry staple.
Methods of Drying Fresh Herbs

When it comes to preserving the flavors of your fresh herbs, there are several effective methods you can choose from. Each method has its own advantages, allowing you to select the one that best suits your needs and preferences. Whether you prefer a traditional approach or a quicker drying technique, we have step-by-step instructions and helpful tips to guide you along the way.
Air-Drying
One of the most popular and traditional methods of drying fresh herbs is air-drying. This method involves allowing your herbs to dry naturally in a well-ventilated space. Here’s how you can air-dry your herbs:
- Harvest your herbs in the morning when their essential oils are at their peak.
- Rinse the herbs gently to remove any dirt or debris.
- Tie small bunches of herbs together with twine or string.
- Hang the herb bundles upside down in a cool, dry place away from direct sunlight.
- Leave the herbs to air-dry for about two to three weeks, or until they become brittle.
- Once dried, remove the leaves from the stems, discard any unwanted parts, and store the dried herbs in airtight containers.
Oven-Drying
If you prefer a quicker drying method, oven-drying is a great option. This method uses low heat to gently dry your herbs, reducing the overall drying time. Follow these steps to oven-dry your herbs:
- Preheat your oven to the lowest temperature setting (around 120°F to 150°F).
- Rinse the herbs gently to remove any dirt or debris.
- Place the herbs on a baking sheet lined with parchment paper.
- Put the baking sheet in the oven and leave the door slightly ajar to allow moisture to escape.
- Check the herbs regularly, as oven-drying can be faster than other methods. It usually takes around 1 to 4 hours, depending on the herb.
- Once the herbs are dry and crumbly, remove them from the oven and let them cool.
- Separate the leaves from the stems, discard any unwanted parts, and store the dried herbs in airtight containers.
Did you know? Oven-drying is a great option for herbs that have a higher moisture content, such as basil and mint, as the gentle heat helps remove the moisture more quickly without affecting the flavor and color.
Microwave-Drying
For those in need of a super-fast drying method, the microwave can be your best friend. Here’s how to microwave-dry your herbs:
- Rinse the herbs gently to remove any dirt or debris.
- Place a single layer of leafy herbs on a microwave-safe plate lined with a paper towel.
- Cover the herbs with another paper towel to absorb excess moisture.
- Microwave the herbs in short intervals of 20 to 30 seconds on low to medium power.
- Check the herbs between intervals to ensure they don’t become brittle or burn.
- Repeat the process until the herbs are dry and crumbly.
- Allow the herbs to cool, then separate the leaves from the stems, discard any unwanted parts, and store the dried herbs in airtight containers.
If you have a food dehydrator or a herb dryer, they can also be used to dry fresh herbs effectively. Follow the manufacturer’s instructions for best results.
Now that you are familiar with various methods of drying fresh herbs, you can choose the one that suits your needs and start preserving your herbs today!
| Method | Advantages |
|---|---|
| Air-Drying | Preserves the herb’s flavor and aroma, traditional method, low cost |
| Oven-Drying | Quick drying, preserves color and flavor, suitable for herbs with higher moisture content |
| Microwave-Drying | Super-fast drying, retains flavor and color, suitable for small quantities of herbs |
| Food Dehydrator or Herb Dryer | Efficient drying, precise temperature control, suitable for larger quantities of herbs |
Storing Dried Herbs Properly
Now that your herbs are dried to perfection, it’s essential to store them properly to maintain their quality, flavor, and potency. Using the right containers and following appropriate storage methods will ensure that your dried herbs stay fresh for as long as possible.
The Right Containers
To store your dried herbs, choose airtight containers that protect them from moisture, light, and air exposure. Here are some container options:
- Glass Jars: Mason jars or other glass containers with tight-fitting lids are excellent choices for storing dried herbs. They not only keep your herbs fresh but also allow you to see and appreciate the vibrant colors.
- Plastic Containers: Look for food-grade plastic containers with airtight seals. These containers are lightweight and convenient, making them ideal for storing larger quantities of herbs.
- Resealable Bags: If space is a concern, choose resealable bags made specifically for storing herbs. Opt for bags with a thick, durable material that offers maximum protection against air and light.
Note: Whichever container you choose, make sure it is clean and completely dry before adding your dried herbs.
Storage Methods
Proper storage methods are vital for preserving the flavor, aroma, and potency of your dried herbs. Here are some tips to ensure their longevity:
- Keep in a Cool, Dark Place: Store your dried herbs in a cool, dark location away from direct sunlight and heat sources, such as the stove or oven. A pantry or cupboard works well.
- Avoid Moisture: Moisture can cause dried herbs to lose their potency and even develop mold. Ensure that the storage area is dry and that the containers are tightly sealed.
- Avoid Air Exposure: Oxygen can deteriorate the quality of your dried herbs over time. Whenever you open a container, be sure to reseal it tightly to minimize air exposure.
“By storing your dried herbs properly, you can enjoy their freshness and flavor for an extended period, enhancing your culinary creations with ease.”
| Container Option | Advantages |
|---|---|
| Glass Jars | Allows visibility, airtight, preserves vibrant colors |
| Plastic Containers | Lightweight, convenient for larger quantities |
| Resealable Bags | Saves space, airtight, protects against air and light |
Tips for Storing Dried Herbs
Now that you’ve successfully dried your herbs, it’s essential to store them properly to preserve their freshness, flavor, and aroma. Follow these expert tips and tricks to ensure your dried herbs stay vibrant and fragrant for months to come:
- Choose the right containers: Use airtight glass jars or containers with a tight seal to keep moisture out and maintain the quality of your dried herbs. Avoid plastic containers, as they can retain moisture and compromise the flavor.
- Label and date your herbs: Avoid confusion by labeling each container with the name of the herb and the date of drying. This will help you keep track of freshness and ensure you use the oldest herbs first.
- Store in a cool, dark place: Light and heat can degrade the flavor and potency of dried herbs. Choose a cool, dark location such as a pantry or cupboard away from direct sunlight and heat sources like stoves or ovens.
- Avoid storing near strong odors: Dried herbs can easily absorb strong odors from neighboring spices or foods. Keep them separate from pungent ingredients like garlic, onions, or coffee to maintain the integrity of their natural aromas.
- Organize your herb collection: Arrange your dried herbs by type or alphabetically to easily locate and access the desired herb when cooking. Use a spice rack or drawer organizer to keep them neat and organized.
With these tips, your dried herb collection will stay fresh, potent, and ready to enhance a wide range of culinary creations. Experiment with different herb combinations, and enjoy the convenience and delicious flavors that dried herbs bring to your cooking.
“Properly stored dried herbs bring forth the essence of your culinary creations. By following these storage tips, you’ll always have the perfect flavor and aroma at your fingertips.”
Now that you know how to store your dried herbs, it’s time to explore the countless ways you can incorporate them into your cooking. But before we dive into the delicious recipes and dishes, let’s delve into the art of using dried herbs to enhance the flavors of your favorite meals.
Using Dried Herbs in Cooking
Now that you have your dried herbs ready, it’s time to unleash their incredible flavors and aromas in your culinary creations. Whether you’re a seasoned chef or a cooking enthusiast, incorporating dried herbs into your dishes can elevate them to new heights. Let’s explore some creative ways to use dried herbs in your cooking.
1. Seasoning Blends
Create your own signature seasoning blends by combining different dried herbs. Experiment with various herb combinations to enhance the taste of meats, vegetables, soups, and sauces. Whether you prefer a savory blend with dried thyme, rosemary, and oregano or a more vibrant blend with dried basil, parsley, and dill, the possibilities are endless. Let your taste buds be your guide, and don’t be afraid to get adventurous!
2. Infused Oils and Vinegars
Add a burst of flavor to your favorite oils and vinegars by infusing them with dried herbs. Place a few sprigs of dried herbs, such as basil or rosemary, into a bottle of olive oil or balsamic vinegar and let them steep for a few weeks. The result? A versatile and aromatic culinary ingredient that can be used as a dressing, marinade, or drizzled over roasted vegetables and grilled meats.
3. Herbal Teas
Expand your beverage options by using dried herbs to create herbal teas. Blend dried chamomile, mint, or lavender for a soothing and aromatic cup of tea. You can also mix dried lemon verbena, hibiscus, and ginger for a refreshing and zesty infusion. Experiment with different herb combinations and find your perfect blend for relaxation or an energizing morning boost.
4. Herbed Butter and Compound Butters
Take your butter to the next level by infusing it with dried herbs. Mix softened butter with dried herbs like thyme, sage, or chives to create a flavorful spread. Use herbed butter to elevate the taste of grilled meats, seafood, or steamed vegetables. You can also create compound butters by adding additional ingredients like garlic, lemon zest, or spices for an extra punch of flavor.
5. Homemade Herb Salt
Create your own herb-infused salt by combining dried herbs with sea salt. This aromatic seasoning can add depth to your dishes and become a staple in your kitchen. Mix dried herbs like rosemary, thyme, and sage with coarse sea salt to create a versatile herb salt that can be used for roasting, grilling, or seasoning your favorite dishes.
Did You Know?
Using dried herbs in your cooking is not only convenient but also cost-effective. They have a longer shelf life compared to fresh herbs and are readily available throughout the year.
The possibilities for using dried herbs in cooking are endless. Whether you’re adding them to sauces, marinades, soups, or simply sprinkling them over roasted vegetables, dried herbs can bring depth, complexity, and a burst of flavor to any dish.
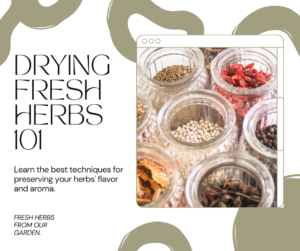
Now, let’s pause for a moment and appreciate the visual appeal of herbs in their dried form. Take a look at the image below to see a delightful assortment of dried herbs just waiting to enhance your culinary creations:
With their versatile flavors and aromas, dried herbs are a must-have in any kitchen. They can transform ordinary dishes into extraordinary culinary experiences, allowing you to savor the essence of your favorite herbs year-round.
Now that you’re armed with creative ideas to use dried herbs in your cooking, it’s time to let your culinary imagination run wild. Experiment, explore, and enjoy the flavorful journey that dried herbs can take you on.
Utilizing Dried Herbs for Flavor Enhancement
Dried herbs are a convenient and versatile way to enhance the flavors of your meals. Whether you’re looking to add a subtle hint of earthiness or a burst of aromatic intensity, utilizing dried herbs can take your culinary creations to new heights.
When using dried herbs for flavor enhancement, it’s important to consider the unique characteristics and intensity of different herbs. Each herb brings its own distinct qualities to a dish, allowing you to tailor your flavor profiles and create a harmonious balance.
Here are some tips to help you unlock the full potential of dried herbs in your cooking:
1. Choose the Right Herb for the Dish
Selecting the appropriate dried herb for a specific dish is key to achieving optimal flavor enhancement. Consider the overall taste and aroma you’re aiming for, and choose herbs that complement the other ingredients.
2. Understand the Flavor Intensity
Dried herbs have a more concentrated flavor compared to their fresh counterparts. Keep this in mind when adding them to your dishes. Start with small amounts, tasting as you go, and adjust according to your preference.
3. Experiment with Herb Combinations
Combine different dried herbs to create unique flavor profiles. For example, the classic combination of oregano, basil, and thyme adds a Mediterranean touch to pasta sauces and pizzas.
4. Crush or Grind Dried Herbs
To release the full flavor potential of dried herbs, crush or grind them before adding them to your recipes. This helps to unlock their aromatic oils, intensifying the flavors.
5. Time Your Herb Additions
Add dried herbs early in the cooking process for dishes that require longer simmering, such as soups and stews, to allow the flavors to infuse. For dishes that cook quickly, like stir-fries, sprinkle the herbs towards the end to preserve their delicate flavors.
Remember, the goal of utilizing dried herbs for flavor enhancement is to elevate your dishes and create a memorable culinary experience. With a little experimentation and the right combination of herbs, you can add depth, complexity, and a touch of sophistication to your home-cooked meals.
| Herb | Flavor Profile | Culinary Uses |
|---|---|---|
| Basil | Sweet, peppery, slightly minty | Pasta sauces, pesto, salads |
| Oregano | Pungent, earthy, slightly bitter | Pizza, tomato-based dishes, marinades |
| Thyme | Earthy, lemony, slightly floral | Roasted meats, stews, soups |
| Rosemary | Piney, citrusy, slightly bitter | Roasted vegetables, grilled meats, bread |
| Parsley | Grassy, fresh, slightly peppery | Garnish, salads, sauces |
“Dried herbs are like flavor capsules that instantly elevate your dishes with their concentrated essence.”
So why wait? Start utilizing dried herbs for flavor enhancement today and let your taste buds embark on a culinary adventure. With a dash of creativity and a sprinkle of dried herbs, you can transform simple meals into extraordinary culinary masterpieces.
Recipes and Dishes to Incorporate Dried Herbs

Now that you have a collection of dried herbs ready to use, it’s time to explore some delicious recipes and dishes that will elevate your culinary creations. Whether you’re looking to add a burst of flavor to soups and stews or infuse marinades and dressings with aromatic herbs, we’ve got you covered. Get ready to tantalize your taste buds with these mouthwatering recipes!
Savory Herb-Roasted Chicken
Impress your dinner guests with this savory herb-roasted chicken recipe. The combination of dried rosemary, thyme, and sage creates a fragrant and flavorful crust, while the juicy meat remains tender and succulent. Serve it alongside roasted vegetables for a complete and satisfying meal.
Greek-Inspired Lemon Potatoes
Take your potato game to the next level with these Greek-inspired lemon potatoes. The addition of dried oregano and dill brings a refreshing Mediterranean twist to this classic side dish. Crispy on the outside, tender on the inside – these potatoes are sure to be a hit at any gathering.
Homemade Tomato Basil Soup
Cozy up with a bowl of homemade tomato basil soup that’s bursting with flavors. The combination of dried basil, thyme, and oregano adds depth and complexity to the sweet and tangy tomatoes. Pair it with a grilled cheese sandwich for the ultimate comfort food experience.
Fresh Herb Quinoa Salad
Add a vibrant and nutritious dish to your menu with this fresh herb quinoa salad. The blend of dried parsley, cilantro, and mint creates a refreshing and herbaceous flavor profile that complements the wholesome quinoa and crunchy vegetables. It’s perfect as a light lunch or a flavorful side.
Lemon Herb Butter Sauce
Take your seafood or grilled meats to new heights with this zesty lemon herb butter sauce. The combination of dried thyme, rosemary, and parsley, mixed with tangy lemon juice, creates a rich and aromatic sauce that enhances any dish. Drizzle it over salmon or steak for a burst of freshness.
Herb-Infused Olive Oil
Elevate your cooking with homemade herb-infused olive oil that’s packed with flavor. Using a blend of dried herbs like basil, rosemary, and garlic, you can create a versatile oil that can be used for sautéing, dressing salads, or dipping crusty bread. It also makes a thoughtful homemade gift for fellow food enthusiasts.
| Recipes and Dishes | Description |
|---|---|
| Savory Herb-Roasted Chicken | Aromatic herb crust on tender roasted chicken. |
| Greek-Inspired Lemon Potatoes | Crispy potatoes with a Mediterranean twist. |
| Homemade Tomato Basil Soup | Sweet and tangy tomato soup with a hint of herbs. |
| Fresh Herb Quinoa Salad | Wholesome quinoa salad with a burst of herbaceous flavor. |
| Lemon Herb Butter Sauce | Zesty sauce to elevate seafood and grilled meats. |
| Herb-Infused Olive Oil | A versatile oil that adds a burst of flavor to any dish. |
FAQ
Q. How do I dry fresh herbs at home?
A. Drying fresh herbs at home is easy! There are several methods you can use, including air-drying and oven-drying. We’ll guide you through each technique step-by-step in our comprehensive guide.
Q. Why is it important to dry and preserve herbs?
A. Drying and preserving herbs allows you to enjoy their flavors and aromas all year round. It helps to extend the shelf life of herbs and prevents wastage. Plus, dried herbs can be easily incorporated into your cooking for added taste and nutritional benefits.
Q. How do I choose the right herbs to dry?
A. Not all herbs are suitable for drying. Some herbs retain their flavors and textures better than others. We’ll help you identify the herbs that are perfect for drying so that you can make the most of your herb garden or store-bought herbs.
Q. When is the best time to harvest herbs for drying?
A. Timing is crucial when harvesting herbs for drying. To capture the maximum flavor and potency, it’s important to harvest the herbs at the right moment. We’ll guide you on the best times to harvest different herbs for optimal drying results.
Q. What are the different methods of drying fresh herbs?
A. There are various methods you can use to dry herbs, including air-drying and oven-drying. Each method has its advantages and suitability for different herbs. We’ll provide you with detailed instructions and tips for each technique.
Q. How should I store dried herbs?
A. Proper storage is essential to maintain the quality and freshness of dried herbs. We’ll inform you about the best containers and storage methods for preserving dried herbs, ensuring they stay flavorful and potent for as long as possible.
Q. Do you have any tips for storing dried herbs?
A. Absolutely! We’ll share additional tips and tricks for storing dried herbs, such as labeling and organizing your herb collection. With our advice, you’ll be able to keep your dried herbs in pristine condition and easily access them whenever needed.
Q. How can I use dried herbs in cooking?
A. Dried herbs are incredibly versatile and can be used in a variety of dishes. From seasoning blends to infusions and more, we’ll provide you with creative ideas to incorporate dried herbs into your cooking and enhance the flavors of your favorite recipes.
Q. How can dried herbs enhance the flavor of my meals?
A. Dried herbs have concentrated flavors that can instantly elevate the taste of your meals. We’ll teach you how to infuse your dishes with the unique aromas and tastes of different herbs, allowing you to add depth and complexity to your culinary creations.
Q. Can you suggest any recipes that use dried herbs?
A. Certainly! We’ve compiled a collection of delicious recipes and dishes that make the most of dried herbs. From soups and stews to marinades and dressings, you’ll find plenty of inspiration to incorporate dried herbs into your cooking and delight your taste buds.
Conclusion
Congratulations! You’ve now mastered the art of drying fresh herbs at home. By following our expert techniques and tips, you can effortlessly preserve the incredible flavors of your favorite herbs and take your cooking to new heights. So go ahead, enjoy the satisfaction of having a well-stocked herb pantry and elevate your culinary creations with ease.
With the knowledge you’ve gained, you can confidently select the herbs best suited for drying, harvest them at the ideal time, and choose the most suitable drying method. Remember to store your herbs properly using the right containers and methods, ensuring they stay fresh and full of potent flavors for longer.
From infusing dishes with the unique aromas and tastes of different herbs to trying out new recipes and flavor combinations, dried herbs offer endless possibilities for enhancing your favorite meals. Whether you’re adding depth to a hearty stew or adding a sprinkle of dried herbs to a simple salad dressing, you can now effortlessly incorporate the vibrant flavors of dried herbs into your cooking.
So don’t wait any longer—put your newfound skills to use and savor the delights of dried herbs. With your well-preserved herb collection, you’ll have an abundant supply of aromatic and flavorful herbs at your fingertips all year round. Let your creativity flourish in the kitchen and enjoy the wonders that dried herbs can bring to your culinary creations.


