Welcome to our comprehensive guide on how to make homemade fertilizers that will help your flowers thrive and blossom. By using DIY solutions, you can provide your plants with the nutrients they need, without the need for expensive store-bought products. Not only will you save money, but you’ll also have the satisfaction of knowing that you are using natural and eco-friendly methods to support the growth of your beautiful blooms.
If you’re looking for effective ways to boost the health and vitality of your flowers, you’ve come to the right place. In this article, we will explore various homemade fertilizer recipes that are easy to make and cost-effective. Whether you’re a beginner or an experienced gardener, these DIY solutions will help you achieve impressive results in your flower garden.
Key Takeaways:
- Creating homemade fertilizers is a cost-effective and eco-friendly alternative to store-bought products.
- DIY fertilizers provide the necessary nutrients for your flowers to bloom healthily and vibrantly.
- By making your own fertilizers, you have full control over the ingredients and can avoid harsh chemicals.
- Using homemade fertilizers promotes a more sustainable and environmentally friendly gardening practice.
- Stay tuned as we explore different DIY fertilizer recipes and techniques to enhance the growth of your flowers!
Benefits of DIY Fertilizers for Flower Growth
Using DIY fertilizers for your flowers provides numerous advantages that benefit both your garden and the environment. Let’s explore the benefits of homemade fertilizers:
-
Promotes Healthier Blooms
DIY fertilizers are rich in essential nutrients that promote healthy flower growth. By customizing your fertilizer mix, you can ensure your flowers receive the specific nutrients they need to thrive. This targeted approach leads to brighter, more vibrant blooms that will surely impress your neighbors and friends.
-
Reduces Chemical Exposure
Commercial fertilizers often contain synthetic chemicals that can be harmful to the environment and potentially affect the health of your flowers. When you make your own fertilizers, you have control over the ingredients used, allowing you to avoid harsh chemicals and reduce chemical exposure for both you and your plants.
-
Cost-Effective Solution
Homemade fertilizers are budget-friendly alternatives to store-bought options. By utilizing household items and organic waste, you can create effective fertilizers without breaking the bank. This cost-saving method is especially beneficial for avid gardeners or those with larger flower beds to maintain.
-
Eco-Friendly Gardening
Using DIY fertilizers aligns with eco-friendly gardening practices. By repurposing organic waste and reducing reliance on synthetic fertilizers, you contribute to a sustainable approach to gardening. Not only does this benefit your flowers, but it also helps reduce environmental impact by minimizing chemical runoff and landfill waste.
Now that you understand the benefits of DIY fertilizers, it’s time to dive into the factors to consider when making your own homemade fertilizers. Let’s move on to the next section to learn more.
Factors to Consider When Making DIY Fertilizers
When it comes to making your own DIY fertilizers, there are several important factors to consider. These factors play a crucial role in ensuring that your homemade fertilizer is effective and provides the necessary nutrients for your flowers to thrive.
Nutrient Requirements
Understanding the nutrient requirements of your flowers is the first step in creating a balanced DIY fertilizer. Different plants have varying nutrient needs, so it’s essential to research the specific requirements of the flowers you’re growing. This information will guide you in selecting the right ingredients for your homemade fertilizer.
Composting Techniques
Composting is an excellent way to create nutrient-rich organic matter for your DIY fertilizers. Proper composting techniques ensure that the organic materials decompose efficiently, resulting in a high-quality fertilizer. Remember to include a mix of “green” materials (such as grass clippings and kitchen scraps) and “brown” materials (such as dried leaves and wood chips) to maintain a balanced compost pile.
Ingredient Ratios
The ratio of ingredients in your DIY fertilizer recipe is crucial for providing the right blend of nutrients to your flowers. Different plants require varying amounts of nitrogen, phosphorus, and potassium (also known as NPK), which are the three primary nutrients found in fertilizers. A soil test can help determine the nutrient levels in your soil and guide you in creating a fertilizer with the correct ingredient ratios.
Application Frequency
Applying DIY fertilizers at the right frequency is vital to avoid over-fertilization or nutrient deficiencies in your plants. Depending on the needs of your flowers, you may need to apply fertilizer every two weeks, once a month, or during specific growth stages. Regularly monitoring your plants’ health and observing growth patterns will help you determine the appropriate application frequency for your homemade fertilizer.
Fertilizer Storage
Proper storage of DIY fertilizers is essential to maintain their effectiveness and prevent nutrient loss. Store your homemade fertilizers in a cool, dry place, away from direct sunlight. Using airtight containers will help preserve the nutrients and prevent moisture from reaching the fertilizers, ensuring their longevity.
By considering these factors when making your DIY fertilizers, you can create a nutrient-rich blend that will support the healthy growth of your flowers. But remember, it’s always a good idea to test your homemade fertilizers on a small area of your garden before applying them to your entire flower bed. This way, you can observe how your plants respond and make any necessary adjustments to your fertilizer recipe.
Common Household Items as Fertilizers
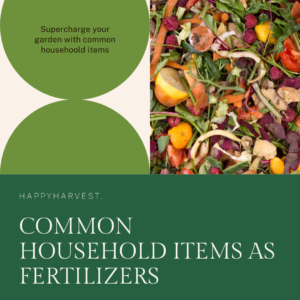
In this section, we will explore everyday items that can be used as fertilizers in your garden. Discover how these common household items can provide essential nutrients to your flowers, promoting healthy growth and vibrant blooms.
Coffee Grounds
Did you know that your morning cup of coffee can benefit your garden too? Coffee grounds are rich in nitrogen, phosphorus, and potassium, making them an excellent natural fertilizer for plants. Simply sprinkle the used coffee grounds around the base of your flowers. Not only will it provide nutrients, but it can also improve soil drainage and retain moisture.
Tea Leaves
The next time you steep a cup of tea, save the used tea leaves for your plants. Tea leaves contain tannic acid and other nutrients that help acid-loving flowers thrive. Spread the tea leaves around the roots of acid-loving flowers such as rhododendrons, azaleas, and hydrangeas. The organic matter in tea leaves also improves soil structure and fertility.
Eggshells
Don’t toss those eggshells in the trash! Crushed eggshells can be an excellent source of calcium for your flowers. The calcium-rich shells help prevent blossom end rot in tomatoes and peppers and enhance root development in all types of plants. After washing and drying the eggshells, crush them into small pieces and sprinkle them around the base of your flowers.
Banana Peels
Don’t peel bananas and throw away those peels! Instead, save them to nourish your flowers. Banana peels are rich in potassium, which promotes flowering and fruiting in plants. Chop the banana peels into small pieces and bury them near the roots of your flowers. Over time, the peels will decompose, releasing valuable nutrients into the soil.
Common Household Items as Fertilizers
| Household Item | Nutrients | Benefits |
|---|---|---|
| Coffee Grounds | Nitrogen, phosphorus, potassium | Improves soil drainage, retains moisture |
| Tea Leaves | Tannic acid, organic matter | Helps acid-loving flowers thrive, improves soil structure |
| Eggshells | Calcium | Prevents blossom end rot, enhances root development |
| Banana Peels | Potassium | Promotes flowering and fruiting |
By utilizing these common household items as fertilizers, you can provide your flowers with a natural and cost-effective boost. Experiment with different combinations and techniques to find what works best for your garden. Remember, sustainability and eco-friendliness are just a few steps away, right in your kitchen!
Organic Waste Fertilizers
Did you know that your kitchen waste can be transformed into nutrient-rich food for your flowers? By using organic waste such as vegetable and fruit scraps, you can create homemade fertilizers that are both eco-friendly and effective. Not only will you be reducing landfill waste, but you’ll also be providing essential nutrients to nourish your plants.
Converting organic waste into fertilizer is a simple and sustainable way to enrich your flower garden. Instead of throwing away food scraps, give them a second life by turning them into valuable resources for your plants.
There are several methods you can use to create organic waste fertilizers. Some popular options include composting, vermicomposting, and bokashi composting. Each technique offers its own unique benefits and can be adjusted based on your specific needs.
Composting
Composting is a natural process that breaks down organic materials into nutrient-rich soil amendments. By creating a compost pile or using a compost bin, you can easily transform your kitchen waste into compost.
Here’s a basic guide to composting:
- Collect vegetable and fruit scraps, coffee grounds, eggshells, and other organic waste.
- Layer the materials in your compost bin, alternating between nitrogen-rich greens (such as fruit and vegetable scraps) and carbon-rich browns (such as dried leaves or shredded paper).
- Add water to keep the compost moist, but not soggy.
- Regularly turn the compost to aerate it and speed up the decomposition process.
- After a few months, your compost will be ready to use as a fertilizer for your flowers.
Compost provides a balanced mix of nutrients, improves soil structure, and enhances water retention. It’s a fantastic way to boost plant growth while reducing waste.
Vermicomposting
Vermicomposting is a process that uses worms to break down organic matter. By setting up a worm bin, you can speed up decomposition and produce nutrient-rich vermicompost.
Here are the steps to start vermicomposting:
- Find a suitable container for your worm bin, such as a plastic storage bin.
- Add bedding material like shredded newspaper or coconut coir to the bin.
- Introduce redworms (Eisenia fetida) to the bin. These worms are commonly used in vermicomposting.
- Add vegetable and fruit scraps to the bin, burying them under the bedding material.
- Maintain the right moisture level in the bin, keeping it damp but not overly wet.
- Harvest the vermicompost from the bin as it becomes ready.
Vermicompost is a nutrient-packed fertilizer that enhances soil fertility and stimulates plant growth. It’s an excellent choice for indoor gardening and can be used in flower beds, containers, and even houseplants.
Bokashi Composting
Bokashi composting is an anaerobic fermentation process that involves the use of beneficial microbes to break down food waste quickly. It’s an efficient and odor-free method of turning organic waste into compost.
Here’s how you can start bokashi composting:
- Get a bokashi composting kit, which typically includes an airtight container and bokashi bran.
- Place your food scraps in the container and sprinkle a layer of bokashi bran on top.
- Press down on the waste to remove excess air and ensure full contact with the bran.
- Repeat this layering process until the container is full, making sure to add the bran with each layer.
- Seal the container tightly and let it ferment for about two weeks.
- After fermentation, bury the fermented waste in your garden, covering it with soil.
Bokashi composting is a convenient option for small spaces and can be used year-round. The fermented waste provides valuable nutrients and helps improve soil health.
| Method | Benefits |
|---|---|
| Composting | Provides balanced nutrients, improves soil structure, and enhances water retention. |
| Vermicomposting | Produces nutrient-rich vermicompost quickly, suitable for indoor and outdoor use. |
| Bokashi Composting | Anaerobic fermentation process, odor-free, convenient for small spaces. |
Choose the organic waste fertilizer method that fits your gardening needs and start transforming your kitchen waste into a valuable resource for your flowers. Not only will you reduce landfill waste, but you’ll also promote healthier and more vibrant blooms in your garden.
Making Compost Tea as a Fertilizer
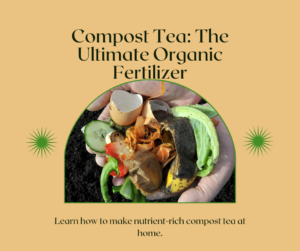
Compost tea is a fantastic natural fertilizer that can help nourish your flowers and encourage healthy growth. It is made by steeping compost in water, allowing the beneficial nutrients and microorganisms to infuse into the liquid. Creating compost tea is a simple and cost-effective way to provide your plants with the nourishment they need.
To make compost tea, follow these easy steps:
- Start by filling a large container, such as a bucket or a barrel, with water. Use dechlorinated water, either by leaving tap water out for a day or using rainwater.
- Add a generous amount of mature compost to a porous bag, like a burlap sack or an old t-shirt. Secure the bag tightly to prevent the compost from escaping into the water.
- Submerge the compost-filled bag in the water and let it steep for 24 to 48 hours. Stir the mixture occasionally to ensure proper aeration.
- After the desired steeping period, remove the compost-filled bag from the container. Your compost tea is now ready to use!
You can apply compost tea to your flowers in various ways. One option is to use it as a foliar spray, misting the leaves and stems of the plants. Another method involves pouring the tea directly onto the soil around the base of your flowers. Whichever method you choose, make sure to fully saturate the plants for optimal absorption.
Compost tea provides several benefits for your flowers’ growth. It not only delivers essential nutrients but also introduces beneficial microorganisms into the soil. These microorganisms help improve soil structure and fertility, enhance nutrient uptake by plants, and suppress harmful pathogens.
“Compost tea is like a supercharged fertilizer for your flowers. It provides a concentrated dose of nutrients and beneficial microorganisms, giving your plants the boost they need to thrive.”
Using compost tea as a fertilizer allows you to nurture your flowers naturally and reduce reliance on synthetic chemicals. It is an eco-friendly alternative that promotes the health and vitality of your garden.
To visually understand the process of making compost tea, refer to the following table:
| Step | Description |
|---|---|
| 1 | Fill a large container with dechlorinated water. |
| 2 | Add mature compost to a porous bag and secure it tightly. |
| 3 | Submerge the bag in the water and let it steep for 24 to 48 hours. |
| 4 | Remove the bag, and your compost tea is ready to use! |
Now that you know how to make compost tea, you can easily incorporate this natural fertilizer into your flower care routine. Enjoy the benefits of healthier and more vibrant blooms by providing your flowers with the nutrients they crave.
Creating a Seaweed Fertilizer Solution
Seaweed is a natural wonder that can work wonders for your flower garden. Its unique composition of nutrients and minerals makes it an excellent choice for providing essential nourishment to your plants. By creating a DIY seaweed fertilizer solution, you can harness the power of this oceanic gift and give your flowers the boost they need to thrive.
Before we dive into the step-by-step process of creating a seaweed fertilizer solution, let’s explore the potential benefits it offers:
- Promotes Growth: Seaweed is packed with growth-promoting hormones like cytokinins and auxins, which can stimulate root development and overall plant growth.
- Enhances Nutrient Uptake: The minerals present in seaweed, such as potassium, calcium, and magnesium, help enhance the absorption of nutrients from the soil, ensuring your flowers receive the necessary nourishment.
- Improves Resistance to Stress: Seaweed contains various compounds that can enhance a plant’s ability to withstand environmental stressors like drought, disease, and pests.
- Boosts Flower Production: The presence of natural plant growth regulators in seaweed can promote the formation and blooming of flowers, resulting in a more vibrant and abundant display.
Now that you understand the potential benefits of using seaweed as a fertilizer, let’s explore how you can create a seaweed fertilizer solution:
- Start by harvesting fresh seaweed from the shoreline or purchasing dried seaweed from a trusted supplier.
- Rinse the seaweed thoroughly to remove any salt or debris.
- Fill a bucket with water, and soak the seaweed in it for 24-48 hours. This process, known as rehydration, allows the seaweed to release its beneficial nutrients into the water.
- After the soaking period, remove the seaweed from the water and strain the liquid into another container.
- Your homemade seaweed fertilizer solution is now ready to use.
When applying the seaweed fertilizer solution to your flower garden, dilute it with water at a ratio of 1:10 (one part seaweed fertilizer solution to ten parts water). This dilution ensures that your plants receive the proper amount of nutrients without causing any harm.
Remember to apply the seaweed fertilizer solution to the base of your flowers, avoiding direct contact with the leaves. You can use a watering can or a spray bottle for precise application.
Tip: For best results, apply the seaweed fertilizer solution every 2-4 weeks, depending on the specific needs of your flowers.
Seaweed Fertilizer Solution Recipe
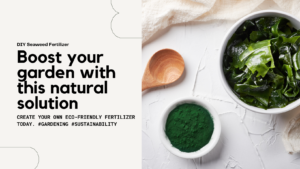
If you prefer a more detailed recipe for creating a seaweed fertilizer solution, here’s a quick and easy method:
| Ingredients | Amount |
|---|---|
| Fresh or dried seaweed | 1 cup |
| Water | 1 gallon |
Instructions:
- Rinse the seaweed thoroughly to remove any salt or debris.
- Fill a gallon-sized container with water.
- Add the rinsed seaweed to the water.
- Cover the container and let the seaweed soak for 24-48 hours.
- Remove the seaweed from the water and strain the liquid into another container.
- Your homemade seaweed fertilizer solution is now ready to use.
By creating your own seaweed fertilizer solution, you can give your flowers a natural and nutrient-rich boost. Enjoy watching your garden flourish with the power of seaweed!
Homemade Fish Emulsion as a Plant Booster
When it comes to natural fertilizers, homemade fish emulsion is a fantastic option for boosting the growth and health of your flowers. Fish emulsion is derived from fish waste, making it an organic and sustainable choice for your garden.
Creating your own homemade fish emulsion is a simple process that requires only a few ingredients. Here’s how you can make your own plant booster:
- Ingredients:
- Fish waste (such as fish guts, heads, and bones)
- Water
- A sealable container or bucket
- Instructions:
- Collect fish waste from your kitchen or local fishing market. It’s best to use fresh fish waste rather than cooked or processed fish.
- Place the fish waste in a sealable container or bucket.
- Add water to the container, covering the fish waste completely.
- Seal the container and let it steep for a few weeks, stirring occasionally.
- After a few weeks, strain the liquid from the solid fish waste using a fine mesh strainer or cheesecloth.
- Your homemade fish emulsion is now ready to use as a powerful plant booster for your flowers.
Once you have your homemade fish emulsion, it’s time to apply it to your flowers. Dilute the fish emulsion by mixing 1 part emulsion with 4 parts water. Use this diluted mixture to water your flowers once every two weeks. The nutrients in the fish emulsion will provide a natural boost to your plants, enhancing their growth, and promoting vibrant blooms.
Whether you have a flower garden, vegetable patch, or indoor plants, homemade fish emulsion can be a valuable addition to your gardening routine. Give it a try and watch your flowers thrive!
FAQ
Q. What are the benefits of using DIY fertilizers for flower growth?
A. DIY fertilizers offer several benefits for your flowers. They promote healthier blooms, reduce chemical exposure in your garden, and are cost-effective compared to store-bought fertilizers.
Q. What factors should I consider when making DIY fertilizers?
A. When creating your own fertilizers, consider the nutrient requirements of your flowers, composting techniques, and the availability of organic waste materials. These factors will help you create an effective and balanced fertilizer for your garden.
Q. Can common household items be used as fertilizers?
A. Yes, several common household items can be used as fertilizers. Coffee grounds and tea leaves provide nitrogen, while eggshells and banana peels offer calcium and potassium. These items can be easily incorporated into DIY fertilizers for your flowers.
Q. How can I use organic waste as fertilizers?
A. Organic waste, such as vegetable and fruit scraps, can be transformed into nutrient-rich fertilizers. By composting these waste materials, you can create a natural and sustainable fertilizer for your flowers.
Q. What is compost tea and how can I make it?
A. Compost tea is a liquid fertilizer made by steeping compost in water. To make compost tea, fill a container with water and add compost. Let it steep for a few days, stirring occasionally. Strain the mixture, and then use the liquid as a fertilizer for your flowers.
Q. How can I create a seaweed fertilizer solution?
A. To make a seaweed fertilizer solution, collect seaweed from beaches or purchase dried seaweed. Rinse the seaweed to remove excess salt, then soak it in water for a few days. Strain the liquid and use the solution to fertilize your flowers.
Q. How can I make homemade fish emulsion as a plant booster?
A. Homemade fish emulsion can be made by combining fish waste, such as fish scraps or fish guts, with water. Let the mixture ferment for several weeks, then strain the liquid. Dilute the fish emulsion with water before applying it as a fertilizer to boost the growth of your flowers.
Conclusion
In conclusion, the use of DIY fertilizers can greatly benefit your flower gardening efforts. By harnessing the power of natural ingredients, you not only provide your flowers with essential nutrients but also play a part in preserving the environment. Homemade fertilizers offer a sustainable and cost-effective solution to nurture the growth and health of your flowers.
Throughout this article, you have learned about the benefits of DIY fertilizers, the factors to consider when making them, and various options using household items and organic waste. From coffee grounds and banana peels to compost tea and seaweed fertilizer, these natural alternatives provide your flowers with the nourishment they need.
Remember, a green thumb can be achieved through the understanding and application of DIY fertilizers. By following the tips and recipes shared in this article, you can enjoy beautiful blooms while reducing the use of chemical fertilizers. Embrace the art of DIY flower gardening and watch your garden thrive with the power of homemade, natural fertilizers.


